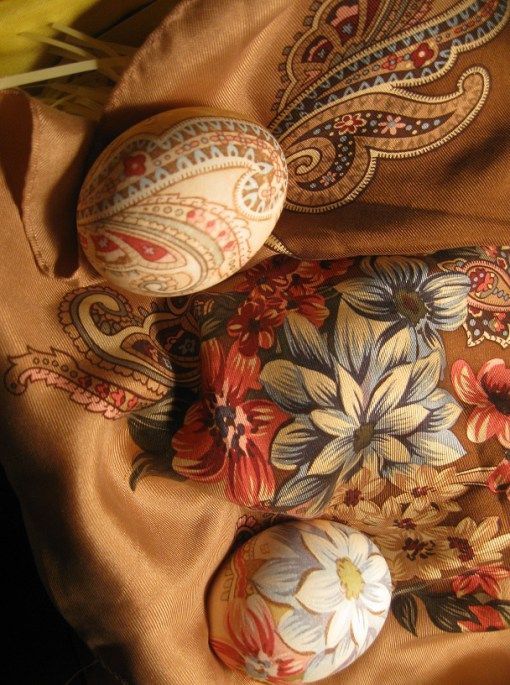
It’s time to think about getting rid of the scarves in the back of your closet and creating a chic and elegant kimono out of them. Despite the fact that this process appears to be quite intricate, it is possible to achieve its goal by combining creativity and craft.
By simply following these simple instructions, you’ll be able to transform your scarves into a fashionable kimono that will speak volumes about your personal style. You can now go for a walk in the park without being hindered by mundane scarves and instead be greeted by a stunning, one-of-a-kind kimono you created with your own hands.
Learn the ins and outs of creating a stunning kimono from two scarves by diving into the details of how to make it. This DIY project will allow you to create a variety of projects, regardless of experience level or interest. Create a wardrobe addition that is both unique and flattering on you.
Materials and Scarf Selection
In the intricate tapestry of fashion, where style meets substance, the choice of materials serves as the foundational brushstroke that paints an exquisite masterpiece. In the realm of crafting a kimono from two scarves, the materials chosen aren’t just fabrics; they are the essence that shapes the very narrative of your creation. The alchemy begins with the scarves themselves – those versatile swaths of textile with untapped potential.
When delving into the artistry of transforming scarves into captivating kimonos, the type of scarves you select assumes paramount importance. Picture scarves crafted from lightweight silk, cascading like a gentle waterfall as you move – a timeless choice that exudes elegance and refinement. Satin scarves, with their lustrous sheen, imbue the kimono with a luxurious aura, reflecting light like a moonlit lake. The more casual charm of cotton scarves brings a breezy nonchalance to your creation, perfect for daytime outings. Woolen scarves, warm and snug, cocoon you in comfort while adding an element of texture to the ensemble.
But the allure doesn’t end at fabric type; patterns and colors weave their own spell. A symphony of patterns can be chosen to harmonize or contrast, depending on the statement you wish to make. The classic grace of floral patterns, the geometric precision of stripes, or the abstract whimsy of polka dots – each pattern tells its own story. Delve into the kaleidoscope of colors – from soothing pastels to bold jewel tones – and let them communicate the mood of your kimono. A subdued palette of cool blues and grays whispers sophistication, while a burst of warm reds and oranges declares vivacity.
Craftsmanship is choice, and choice is an art.
In the realm of crafting, where the tangible and the intangible converge, materials are more than a means to an end; they’re a language. They converse with one another, creating a visual dialogue that captivates the eye and stirs the soul. The juxtaposition of textures – the smooth against the rugged, the sleek against the nubby – adds depth to the narrative your kimono whispers. Consider the interplay of matte and sheen, soft and structured, and allow them to dance in harmony as they drape and fold into your kimono’s silhouette.
As your fingers trace the fabric, you’re not merely handling cloth – you’re navigating through a labyrinth of possibilities. Should you opt for a subtle monochromatic scheme that celebrates minimalism? Or perhaps an audacious clash of colors that embodies boldness? The beauty of crafting lies in the ability to infuse your personal touch into every stitch, every fold, and every choice of material. It’s a medium through which you sculpt not just fabric, but your very identity.
Crafting is creation, and creation is identity.
In your pursuit of the perfect scarf duo, remember that this journey isn’t just about fashion; it’s about self-expression. It’s about intertwining your aesthetic sensibilities with the tactile universe of textiles. The materials you choose are an extension of yourself, a reflection of your taste, and a canvas for your imagination. As you stand before the kaleidoscope of scarves, envision the narrative you want to unveil to the world. Let the materials guide you, inspire you, and empower you to craft a kimono that’s not just worn – it’s lived.
From the gentle whisper of silk against your skin to the vibrant play of colors that dances in the light, your kimono becomes a testament to the language of materials. It’s a story spun with threads, a story that you orchestrate with every choice you make. As you embark on this creative journey, remember that you’re not just crafting a kimono; you’re weaving an experience, a memory, and a piece of art that’s bound to stand out in the tapestry of fashion.
Crafting is storytelling, and storytelling is life.
Necessary Tools
Necessary Tools: Equipping Your Creative Journey
As you embark on the exciting journey of transforming ordinary scarves into exquisite kimonos, having the right tools at your disposal is akin to an artist selecting the finest brushes to create a masterpiece. Just as a painter’s palette holds the key to their artistic vision, your arsenal of tools will be the cornerstone of your crafting endeavor. Let’s delve into the essential tools that will pave your way to crafting excellence:
1. Sewing Machine: Your Creative Engine
Imagine a symphony without its conductor – a sewing machine assumes a similar role in your crafting symphony. This mechanical virtuoso takes your vision and stitches it into reality, ensuring precision and durability that hand-sewing alone cannot match. As the needle dances through fabric, your sewing machine breathes life into your kimono, stitch by stitch.
2. Thread: The Unseen Hero
Thread, like an unseen hero, weaves its magic beneath the surface, holding your creation together. Opt for a thread that complements your scarf fabric, ensuring a seamless union that withstands the test of time. Whether you choose to harmonize or contrast, thread adds the final stroke to your kimono’s artistic canvas.
3. Scissors: The Precision Sculptor
In the hands of a crafter, scissors become precision sculptors, shaping fabric with finesse. From cutting scarves to sizing sleeves, their role is paramount. Choose a pair that’s comfortable to hold and sharp enough to glide through fabric effortlessly, ensuring clean and accurate cuts.
4. Measuring Tape: The Architect’s Blueprint
Every masterpiece starts with a blueprint, and in the realm of crafting, that’s the measuring tape. It lends structure and precision to your project, ensuring that dimensions are accurate and proportions are balanced. From determining the length of your kimono to marking sleeve openings, the measuring tape is your guiding light.
5. Pins: The Temporary Bond
Pins serve as your temporary allies, holding fabric in place while you work your magic. They maintain alignment during sewing, preventing slips and ensuring your kimono emerges with a professional finish. These unassuming companions keep your creativity on track.
6. Iron and Ironing Board: The Fabric Whisperers
Just as a sculptor refines their creation with meticulous care, so must you with your fabric. An iron and ironing board smooth out wrinkles, ensuring your scarves are ready for transformation. They enhance the aesthetic and structural integrity of your kimono, creating a canvas that’s primed for your artistic expression.
7. Marking Tools: Precision Personified
From chalk to tailor’s pencils, marking tools are your secret agents for precision. They help you delineate seam lines, sleeve openings, and more. As you mark your fabric, you’re charting the course for your kimono’s evolution, ensuring every detail is executed flawlessly.
8. Seam Ripper: The Undo Button
Mistakes happen, even in the realm of crafting. Enter the seam ripper – your undo button. This unassuming tool rescues you from sewing mishaps, allowing you to correct errors and ensure your kimono is a testament to your unwavering dedication to perfection.
Crafting is a symphony of tools, each playing its unique melody to create harmony.
These tools, like skilled orchestra members, work in concert to produce a kimono that’s not just a garment, but a work of art. As you wield each tool with intention, you’re crafting more than fabric; you’re crafting an experience. The sewing machine hums with potential, the thread weaves stories, and the scissors sculpt dreams. Together, they’re your companions on this creative journey, translating your vision into a tactile reality.
With every stitch, every cut, and every measurement, you’re not merely assembling fabric; you’re crafting a narrative. Each tool contributes its expertise, ensuring your kimono embodies the essence of your imagination. So, embrace these tools as extensions of your creativity, for they are the conduits through which your artistic spirit flows, turning two scarves into a masterpiece that transcends fashion and becomes a testament to your ingenuity.
Crafting is a journey, and every tool is a landmark along the way.
Preparation

Preparation: Paving the Path to Kimono Crafting Excellence
As you embark on the enchanting journey of creating a kimono from two scarves, meticulous preparation becomes the cornerstone of your crafting escapade. Just as an architect meticulously plans before construction begins, your journey to kimono crafting greatness begins with preparation. This phase lays the groundwork for a flawless execution that transforms ordinary scarves into wearable works of art. Let’s delve into the meticulous steps that ensure your kimono creation stands as a testament to your dedication:
1. Measure and Assess: Precision in Every Stitch
Like a tailor taking measurements for a bespoke suit, measuring your body dimensions is a crucial first step. This blueprint ensures that your kimono drapes you elegantly, creating a silhouette that’s both comfortable and stylish. Start by using a measuring tape to assess key dimensions such as your bust, waist, hips, and arm length. These measurements will serve as your guideposts as you proceed.
- Pro Tip: Keep the measuring tape snug but not tight for accurate measurements.
Once armed with your measurements, it’s time to calculate the required length and width of your kimono. Consider the style you envision – whether it’s a flowing kimono or a more fitted design. Factor in ease of movement, and remember that kimono designs often emphasize loose fits. Calculations may differ depending on whether you’re using one scarf for the front and another for the back or layering both scarves. Armed with these measurements, you’re primed to proceed to the next step.
2. Scarf Ironing: Flattening Wrinkles, Unveiling Potential
As you transition from numbers to textiles, the importance of scarf ironing cannot be overstated. Think of this step as unveiling the canvas on which you’ll work your magic. Before you even think of sewing, ensure that your scarves are wrinkle-free and ready for transformation. Lay each scarf on a flat surface and gently glide a warm iron over them. The heat from the iron will smooth out any wrinkles, providing you with a pristine canvas to bring your kimono to life.
- Pro Tip: Use a pressing cloth or a thin cloth between the iron and the scarf to protect delicate fabrics.
Your preparation is akin to laying the foundation for a grand architectural marvel.
Just as architects meticulously plan every aspect of a building before construction begins, you, too, are weaving a tale of precision and creativity. The measurements you take serve as the blueprint, ensuring that your kimono fits like a second skin. Scarf ironing, much like polishing marble to reveal its natural sheen, unveils the potential of your scarves, making them ready to absorb your artistic vision.
In this realm of crafting, preparation isn’t just a step; it’s a philosophy. It’s the embodiment of attention to detail and a commitment to excellence. With each measurement taken and every wrinkle smoothed, you’re carving a path to crafting mastery. As you embark on the next phases of your kimono journey, know that the preparation you’ve undertaken is the compass that guides you towards a finished piece that’s nothing short of remarkable.
Preparation is foresight, and foresight is crafting mastery.
Cutting and Sewing
Cutting and Sewing: Crafting Your Kimono Masterpiece
As you embark on the captivating journey of transforming scarves into an exquisite kimono, the phases of cutting and sewing are where your creative vision seamlessly intertwines with the precision of craftsmanship. These stages are where the magic truly unfolds, as you transition from raw materials to a wearable work of art. Let’s delve into the meticulous steps that transform your scarves into a kimono that’s a testament to your dedication and flair:
1. Laying Out the Scarves: The Art of Arrangement
Imagine laying out pieces of a puzzle before assembling them into a beautiful picture. Laying out the scarves for your kimono follows a similar principle. Start by finding a flat, spacious surface to work on. Lay each scarf side by side, paying careful attention to ensure that patterns align seamlessly. This visual symphony is akin to composing a masterpiece – as you arrange the scarves, you’re already envisioning the final result.
- Pro Tip: Use pins to hold the scarves in place temporarily while you adjust and align.
2. Cutting: Precision in Every Stroke
Just as a sculptor wields chisel and mallet with precision, you, too, wield your scissors with the same intention. Cutting the scarves is where your creative blueprint takes form. Begin by folding the scarves, aligning edges meticulously to ensure symmetry. Trace the pattern you’ve envisioned onto the fabric, using chalk or tailor’s pencil. Then, with steady hands, carefully cut along the lines you’ve drawn, emphasizing precision and smooth, even edges.
- Pro Tip: Double-check your measurements and lines before making the first cut for accuracy.
3. Sewing the Shoulders: Crafting the Foundation
As the foundation of your kimono takes shape, sewing the shoulders becomes a pivotal step. Align the shoulders of the cut scarves, ensuring that the patterns continue to match seamlessly. This is where your sewing machine takes center stage, delicately stitching the shoulders together. The sound of the machine is a symphony of progress, each stitch anchoring the future of your kimono. This basic structure sets the tone for what’s to come.
4. Side Seams: Stitching Elegance Together
The side seams of a kimono are more than just stitching – they’re where elegance and comfort come together. Begin by aligning the sides of the kimono, creating a loose-fitting sleeve that embodies the kimono’s essence. Stitch these side seams with precision, maintaining an even distance from the edges for a polished finish. The rhythm of the machine, the texture of the fabric – they’re all part of the crafting journey that culminates in a wearable masterpiece.
Your journey through cutting and sewing is a symphony of creation and precision.
Just as a composer meticulously arranges notes to create a symphony, so are you meticulously arranging scarves and stitching them together to create your own masterpiece. Cutting is your brushstroke, sewing your melody. The precision in each step is a testament to your dedication to crafting excellence. As you navigate through the intricacies of laying out, cutting, and sewing, remember that every stitch is an embodiment of your artistic vision.
With every cut, every stitch, and every seam, you’re crafting more than just a kimono; you’re crafting an experience. The process is a testament to your ability to transform fabric into a story – a story of creativity, precision, and the undeniable joy of crafting. As you embark on the next phases of your kimono journey, remember that what you’re creating is more than just clothing – it’s a wearable testament to your dedication, passion, and artistry.
Crafting is creation, and creation is a journey of the heart and hands.
Adding Sleeves

Adding Sleeves: Elevating Your Kimono Creation
In the tapestry of crafting, adding sleeves to your kimono is where your creation truly takes shape, transforming it from a canvas of fabric into a three-dimensional wearable art piece. Like the final brushstrokes that complete a painting, the addition of sleeves imbues your kimono with a sense of elegance and functionality. Let’s delve into the meticulous steps that ensure your sleeves align with your creative vision, creating a harmonious blend of aesthetics and comfort:
1. Creating Sleeve Openings: A Measure of Precision
Just as a tailor’s measuring tape is an extension of their skill, measuring and marking sleeve openings is your gateway to a well-fitted kimono. Begin by measuring from the shoulder seam down to where you want the sleeves to start. Mark this point on both the front and back of the kimono with chalk or tailor’s pencil. This measured precision ensures that your sleeves are not only comfortable but also aesthetically aligned.
- Pro Tip: Use a ruler or straight edge to ensure your markings are accurate and even.
Once the measurements are marked, it’s time to cut the sleeve openings. Begin by creating a small snip at the marked point and then cut along the lines you’ve drawn. The goal is to create an opening that allows for ease of movement while maintaining the overall structure of the kimono. Finish the edges of the openings with a neat and even stitch, ensuring durability and a polished look.
2. Attaching Sleeves: Where Aesthetics Meet Comfort
Imagine a seamstress delicately stitching together the pieces of a gown – attaching sleeves is a similar exercise in finesse. Lay the sleeve fabric over the kimono body, aligning the edges of the sleeve opening and the kimono. Pin them in place, securing them for the next step. As you sew the edges together, the magic happens – your kimono gains an additional layer that’s as stylish as it is functional.
- Pro Tip: Sew with a slight curve, ensuring that the sleeve drapes naturally along your arm.
As the stitching progresses, you’re not merely attaching fabric; you’re marrying aesthetics with comfort. The seam you create is a testament to your ability to seamlessly blend design and wearability. The attachment of the sleeves transforms your kimono from an assemblage of parts to a unified whole, ready to be worn and admired.
Your journey through sleeve addition is a symphony of form and function.
Just as a composer orchestrates instruments to create harmony, so are you orchestrating fabric and stitching to create a harmonious kimono. Creating sleeve openings is your musical score, and attaching sleeves is your performance. The precision you employ at every step is a testament to your dedication to crafting excellence. As you navigate through the intricacies of measuring, marking, cutting, and attaching, remember that every stitch is a reflection of your artistic vision.
With every snip, every stitch, and every attachment, you’re crafting more than just a kimono; you’re crafting an experience. The process is a testament to your ability to transform fabric into a story – a story of creativity, precision, and the fusion of aesthetics and comfort. As you step into the final phases of your kimono journey, remember that what you’re creating is more than just a piece of clothing – it’s a wearable masterpiece, an ode to your dedication, passion, and artistry.
Crafting is fusion, and fusion is the art of creating wearable poetry.
Hemming and Finishing Touches
Hemming and Finishing Touches: Crafting Perfection with Every Stitch
As your journey through the art of creating a kimono reaches its final stages, the delicate steps of hemming and adding finishing touches are akin to the crescendo of a musical composition. These stages breathe life into your creation, transforming it from a project into a wearable masterpiece that encapsulates your dedication and vision. Let’s delve into the meticulous steps that ensure your kimono stands as a testament to your craftsmanship and attention to detail:
1. Hemming the Edges: An Ode to Neatness
Hemming is the embodiment of precision and finesse, where every stitch is a testament to your dedication to perfection. Begin by folding the raw edges of your kimono fabric, creating a clean, even edge. Secure the fold with pins, ensuring that the fabric remains smooth and the fold consistent. As you sew along the folded edge, you’re not merely preventing fraying; you’re adding an elegant touch that enhances the overall aesthetics of your kimono.
- Pro Tip: Experiment with different stitches – a simple straight stitch or a decorative zigzag stitch can elevate the hem’s visual appeal.
Hemming isn’t just a step; it’s a celebration of meticulousness. The stitches you create are the threads that bind your creativity to reality, creating a garment that’s as beautiful on the inside as it is on the outside. Each stitch is a reflection of your passion for crafting, ensuring that your kimono withstands the test of time.
2. Adding Belts or Ties: Cinching Elegance
Imagine a painting that’s complete but for the final brushstroke – adding belts or ties to your kimono is that brushstroke, the detail that completes the narrative. Depending on your vision, you can choose to add belts or ties to cinch your kimono at the waist. This not only adds a touch of elegance but also gives you the flexibility to adjust the fit according to your preference.
- Pro Tip: Experiment with contrasting or complementary belts to add a pop of color or texture to your kimono.
As you loop a belt or tie around your kimono, you’re infusing your creation with versatility. You’re allowing your kimono to adapt to different occasions and styles, a reflection of your adaptability and creativity. The addition of belts or ties is the final flourish, the detail that reflects your ability to merge aesthetics and functionality.
Your journey through hemming and finishing touches is a symphony of finesse and elegance.
Just as a conductor guides an orchestra to create a harmonious melody, you, too, are orchestrating fabric and stitching to create a harmonious kimono. Hemming is your cadence, and adding belts or ties is your crescendo. The precision you employ at every step is a testament to your dedication to crafting excellence. As you navigate through the intricacies of hemming and finishing touches, remember that every stitch and detail is a reflection of your artistic vision.
With every fold, every stitch, and every tie, you’re crafting more than just a kimono; you’re crafting an experience. The process is a testament to your ability to transform fabric into a story – a story of creativity, precision, and the seamless union of aesthetics and functionality. As you step into the final phase of your kimono journey, remember that what you’re creating is more than just clothing – it’s a wearable masterpiece, a tangible reminder of your dedication, passion, and artistry.
Crafting is the art of storytelling, and your kimono is your masterpiece’s final chapter.
Customization and Embellishments
Customization and Embellishments: Elevating Your Kimono’s Unique Charm
In the tapestry of creative expression, the art of customization and embellishments transforms your kimono from a template into a canvas that bears the strokes of your individuality and imagination. These final touches are akin to the signature of an artist, adding depth and character to your creation. Let’s delve into the meticulous steps that allow you to imprint your personal style onto your kimono, creating a wearable work of art that reflects your identity:
1. Pockets and Embroidery: Stitching Stories into Fabric
Imagine pockets as secret compartments that hold not just treasures, but stories and memories. Adding pockets to your kimono not only enhances its aesthetic but also provides a functional dimension. Choose the location and size of the pockets carefully, considering both visual appeal and practicality. As you sew them into place, envision the stories that these pockets will carry – the seashell you picked up on a beach, the note from a loved one – each stitch becomes a thread woven into the fabric of your life.
- Pro Tip: Embroider intricate patterns around the pockets for a touch of artistry.
Embroidery, too, is a window into your creativity. Select threads that complement the color palette of your kimono, and choose motifs that resonate with your style. Whether it’s delicate florals, geometric shapes, or symbols of significance, embroidery transforms your kimono into a canvas of expression. Each stitch is a brushstroke, a reflection of your artistic flair.
2. Fringe and Trim: Adorning with Elegance
Fringe and trim are the flourishes that accentuate your kimono’s elegance, adding a touch of opulence that catches the eye. Whether it’s lace, sequins, or colorful threads, fringe and trim are your tools of personalization. Begin by selecting your embellishments – do you envision a kimono adorned with delicate lace or one with vibrant, contrasting trim? Each choice adds a layer of uniqueness that’s a nod to your creativity.
- Pro Tip: Experiment with different textures – the interplay of materials adds visual depth.
As you sew the fringe or trim onto your kimono, you’re creating a fusion of aesthetics and sophistication. Each attachment is a celebration of your discerning eye and your ability to blend elements harmoniously. The fringe sways as you move, the trim catches the light – these details are the punctuation marks that complete your kimono’s narrative.
Your journey through customization and embellishments is a symphony of identity and artistry.
Just as a composer weaves melodies to create a symphony, so are you weaving fabric and design to create a symphony of personal style. Pockets are your verses, embroidery your chorus. Fringe and trim are your crescendo, the moment where your kimono comes alive. With every stitch, you’re imprinting your identity onto the fabric, creating a garment that’s not just beautiful, but deeply personal.
With every pocket, every embroidery, every fringe, and every trim, you’re crafting more than just a kimono; you’re crafting a narrative. The process is a testament to your ability to transform fabric into a story – a story of creativity, identity, and the art of personalization. As you venture into the final phases of your kimono journey, remember that what you’re creating is more than just clothing – it’s a wearable masterpiece that carries the essence of your soul.
Crafting is storytelling, and your kimono is your story’s most expressive chapter.
Final Adjustments

Final Adjustments: Perfecting Your Kimono Creation
As you approach the finale of your kimono crafting journey, the stages of final adjustments are akin to the moments just before a performance – a time to ensure every detail is impeccable, every stitch secure, and every aspect aligned with your creative vision. These last steps are not just about completing a project; they’re about elevating your creation to a level of excellence that reflects your dedication and artistry. Let’s delve into the meticulous steps that ensure your kimono stands as a testament to your craftsmanship and attention to detail:
1. Try-On and Fit Check: A Moment of Validation
Picture the anticipation of slipping into your kimono for the first time – this is your moment of validation. Begin by gently putting on your kimono, allowing the fabric to drape naturally around your body. Take a moment to assess the fit – do the shoulders align comfortably, do the sleeves rest naturally on your arms, does the length feel just right? This is your canvas, and your body is the frame – ensure the alignment is perfect.
- Pro Tip: Invite a friend for an objective perspective – their input can be invaluable.
Should adjustments be needed, this is the time to make them. Whether it’s a minor tweak to the shoulder seam or a subtle alteration to the sleeve length, approach this step with patience and precision. Remember, your kimono is a reflection of your ability to merge aesthetics and wearability seamlessly.
2. Recheck Seams: The Assurance of Security
Just as an architect inspects a building’s foundation, so should you inspect the foundation of your creation – the seams and stitches. Run your fingers along every seam, every stitch, ensuring they’re secure and free from any loose ends. This final inspection is a testament to your meticulousness and commitment to quality.
- Pro Tip: Use a magnifying glass to closely inspect intricate stitching and details.
Reinforce any loose stitches you come across, securing them for longevity. A well-stitched seam is more than just a connection of fabric; it’s a testament to your ability to ensure that your creation can withstand the test of time. Each stitch is a mark of your dedication, your eye for detail, and your pursuit of perfection.
Your journey through final adjustments is a symphony of meticulousness and pride.
Just as a conductor ensures every instrument is in tune, you’re ensuring every detail of your kimono is perfectly aligned. Try-on and fit check are your harmonies, rechecking seams your crescendo. Each step is a note in your composition, a reflection of your craftsmanship and artistic flair. With every adjustment, every inspection, you’re imprinting your identity onto your creation.
With every try-on, every tweak, and every reinforcement, you’re crafting more than just a kimono; you’re crafting a statement. The process is a testament to your ability to transform fabric into a story – a story of dedication, precision, and the pursuit of excellence. As you venture into the final phases of your kimono journey, remember that what you’re creating is more than just clothing – it’s a wearable masterpiece that carries the essence of your commitment and artistry.
Crafting is a symphony, and your kimono is your masterpiece’s grand finale.
Care Instructions
Care Instructions: Nurturing Your Kimono’s Elegance
Just as an artist’s masterpiece deserves a carefully curated environment, so does your kimono – a wearable work of art that embodies your creativity and skill. The care you provide to your kimono is not merely maintenance; it’s an ode to the craftsmanship that brought it to life. To ensure your kimono retains its beauty and charm for years to come, here are the essential care guidelines that will safeguard its longevity and elegance:
Washing: Preserving Beauty Through Gentleness
Washing your kimono is a delicate affair, much like handling a fragile artifact. Before you proceed, pause to appreciate the stories woven into its fabric. Should the need arise for cleaning, follow these steps:
Hand Wash: Fill a basin with cold water and add a mild, pH-neutral detergent. Gently agitate the water to create suds. Submerge the kimono and allow it to soak for a few minutes. Gently rub any soiled areas with your fingertips. Rinse thoroughly with cold water, ensuring all soap is washed out.
Drying: Avoid wringing out the kimono to prevent damage to the delicate fibers. Instead, lay it flat on a clean towel and gently press to remove excess water. Lay the kimono on a drying rack in a shaded area. Avoid direct sunlight, as it may cause fading.
Ironing: Restoring Elegance with Care
Ironing is not just about removing wrinkles; it’s about restoring the kimono’s elegance. Follow these steps to ensure a smooth finish:
Temperature: Set your iron to a low or silk setting – avoid high heat.
Steam: Use a gentle steam setting to prevent direct contact with the fabric.
Ironing Surface: Place a clean, lightweight cloth between the iron and the kimono to protect the fabric.
Gentle Pressure: Apply light pressure and move the iron in gentle, straight strokes. Avoid back-and-forth motion, which may stretch the fabric.
Storing: Nurturing Elegance in Rest
When your kimono is not adorning you, it deserves a resting place that’s as respectful as a museum gallery:
Hangers: Use padded hangers to prevent stretching at the shoulders. Hang the kimono in a cool, dry place, away from direct sunlight.
Storage Bags: If you choose to fold your kimono, use breathable storage bags. Avoid plastic, as it can trap moisture.
Moth Prevention: Insert cedar blocks or lavender sachets to deter moths and keep the fabric fresh.
Regular Inspection: Periodically check for any signs of damage, particularly if you choose to hang your kimono.
- Pro Tip: When storing for extended periods, refold the kimono occasionally to prevent creasing in the same areas.
Preservation: A Testament to Your Dedication
As you follow these care instructions, remember that each action is a testament to your dedication as a custodian of your creation. Just as you painstakingly stitched every seam and selected every detail, so must you invest time in its care. The preservation of your kimono is a continuation of the creative process – it’s the chapter that ensures your wearable masterpiece remains as timeless as your artistry.
Caring for your kimono is an act of respect – a way to honor the hands that crafted it and the spirit that breathes life into it.
FAQs
- How can I repurpose scarves into a kimono?
Transforming scarves into a kimono involves creative steps. First, choose two scarves with complementary patterns and colors. Lay them out on a flat surface to ensure alignment. Cut one scarf in half, creating the front panels. Sew the shoulder seams of the scarves, creating the kimono’s basic structure. Sew the side seams for loose-fitting sleeves. For sleeve openings, measure and cut as desired, then sew them. Attach the sleeves to the body. Hem the edges and consider adding belts or ties for cinching. Personalize with pockets, embroidery, or trims. Try on, adjust, and reinforce seams if needed. Carefully wash, iron, and store to preserve the kimono’s beauty.
- Can I use different types of scarves for this project?
Absolutely, the beauty of repurposing scarves into a kimono lies in your creative freedom. Various types of scarves – silk, cotton, chiffon, or even blends – can be used for this project. The key is to ensure they complement each other in terms of texture, pattern, and color. Keep in mind that different fabrics may behave differently during sewing, so adjust your techniques accordingly. The scarves’ unique qualities can add character to the final piece, making it distinctly yours. Experimenting with diverse scarf types is an exciting way to infuse your personal style into the kimono, resulting in a one-of-a-kind creation.
- What tools are essential for sewing a kimono from scarves?
For sewing a kimono from scarves, essential tools include a sewing machine for precise stitching. You’ll need thread that matches the scarf color, sharp fabric scissors for accurate cutting, and a measuring tape to determine dimensions. Straight pins hold pieces together during sewing, ensuring alignment. A steam iron smooths fabric and seams for a polished finish. Having a seam ripper on hand can help correct mistakes. Optional tools include tailor’s chalk or washable fabric markers for marking patterns and seams. These tools collectively empower you to transform scarves into a beautifully crafted kimono, allowing your creativity to flourish.
- How do I measure the scarves to ensure the kimono fits?
To ensure a well-fitting kimono, accurately measure the scarves using a flexible measuring tape. For the length, measure from your shoulder to the desired length of the kimono, typically around mid-thigh. For the width, extend your arms out to the sides and measure from one wrist to the other across your back. This measurement determines how wide the kimono will be when worn. Ensure the scarves’ patterns align symmetrically during measuring. These precise measurements will guide the cutting and sewing process, resulting in a kimono that drapes comfortably and looks visually appealing.
- What are the steps to sew the shoulders of the kimono?
Sewing the kimono shoulders involves aligning the front and back panels of the scarves, right sides facing. Pin them together at the top edges, ensuring the patterns match. Use a straight stitch on the sewing machine to secure the panels along the pinned edge, creating a seam. Press the seam open with an iron to ensure a flat finish. This step forms the basic structure of the kimono, providing a foundation for subsequent sewing and assembly.
- How do I add sleeves to a scarf-made kimono?
To add sleeves to a scarf-made kimono, mark the desired sleeve opening on the kimono body. Cut the marked area, creating the sleeve openings. Hem the cut edges for a neat finish. Lay out the sleeve fabric, ensuring patterns align with the kimono’s design. Pin the sleeve fabric to the kimono, right sides facing, aligning shoulder seams. Stitch along the pinned edges, securing the sleeves. Press the seams open with an iron. This step completes the attachment of sleeves, creating a harmonious integration with the kimono’s design.
- What are some creative ways to embellish a handmade kimono?
Enhance a handmade kimono with creative embellishments. Consider adding pockets with intricate embroidery, infusing functionality and elegance. Introduce character by attaching fringe or lace to the hem or sleeves, delivering a personalized touch. Experiment with fabric paint to craft unique patterns, showcasing your artistic flair. Incorporate contrasting trim along the edges for a pop of color and texture. Adorn the kimono with delicate appliqués or sequins for a touch of glamour. Beads and buttons can also add dimension and visual interest. These imaginative details transform a simple kimono into a bespoke piece of wearable art, reflecting your individual style and creativity.
- Are there any tips for ensuring a comfortable fit with the kimono?
Achieving a comfortable fit with the kimono involves key considerations. Prioritize precise measurements to ensure the right dimensions. Choose scarves of the appropriate size, allowing flexibility in adjustments. Pay attention to seam placements – secure, even seams prevent discomfort. Opt for loose-fitting sleeves to allow ease of movement. Incorporating ties or belts at the waist offers customization, allowing you to adjust the fit as needed. During the try-on phase, assess the fit and make any necessary tweaks before finalizing. A comfortable fit ensures not only aesthetic satisfaction but also wearable comfort, enhancing your enjoyment of the handmade kimono.
- How should I care for and clean my scarf-created kimono?
To maintain your scarf-created kimono’s longevity and appearance, follow these care guidelines. Hand wash the kimono using a gentle detergent in cold water, avoiding wringing or twisting. Gently press out excess water and lay flat to dry. Iron on low heat with a cloth barrier to prevent direct contact. Store the kimono in a cool, dry place, away from direct sunlight. Avoid hanging to prevent stretching. If embellished, turn the kimono inside out before washing. Regularly check seams and stitches for any signs of wear and tear, addressing them promptly to extend the kimono’s life. By caring for your scarf-made kimono attentively, you can enjoy its beauty for years to come.

Beckley Melendez is the founder and main author of beckleyboutique.com, a website dedicated to beauty and fashion. With a keen eye for style and a passion for all things beauty, Beckley has established herself as a respected voice in the industry. At 33 years old, she continues to share her expert insights and personal experiences with her readers, helping them stay on top of the latest trends and find the products that work best for them. With her unique perspective and engaging writing style, Beckley is a must-read for anyone interested in the world of beauty and fashion.